I have already set up a proxy. Please email me at contact@nabilridhwan.com privately!
Read more here: https://signal.org/blog/run-a-proxy/
This article uses DigitalOcean Droplets and a Domain name from Cloudflare to run a Signal Proxy and focuses on being as user-friendly as possible.
What you'll need
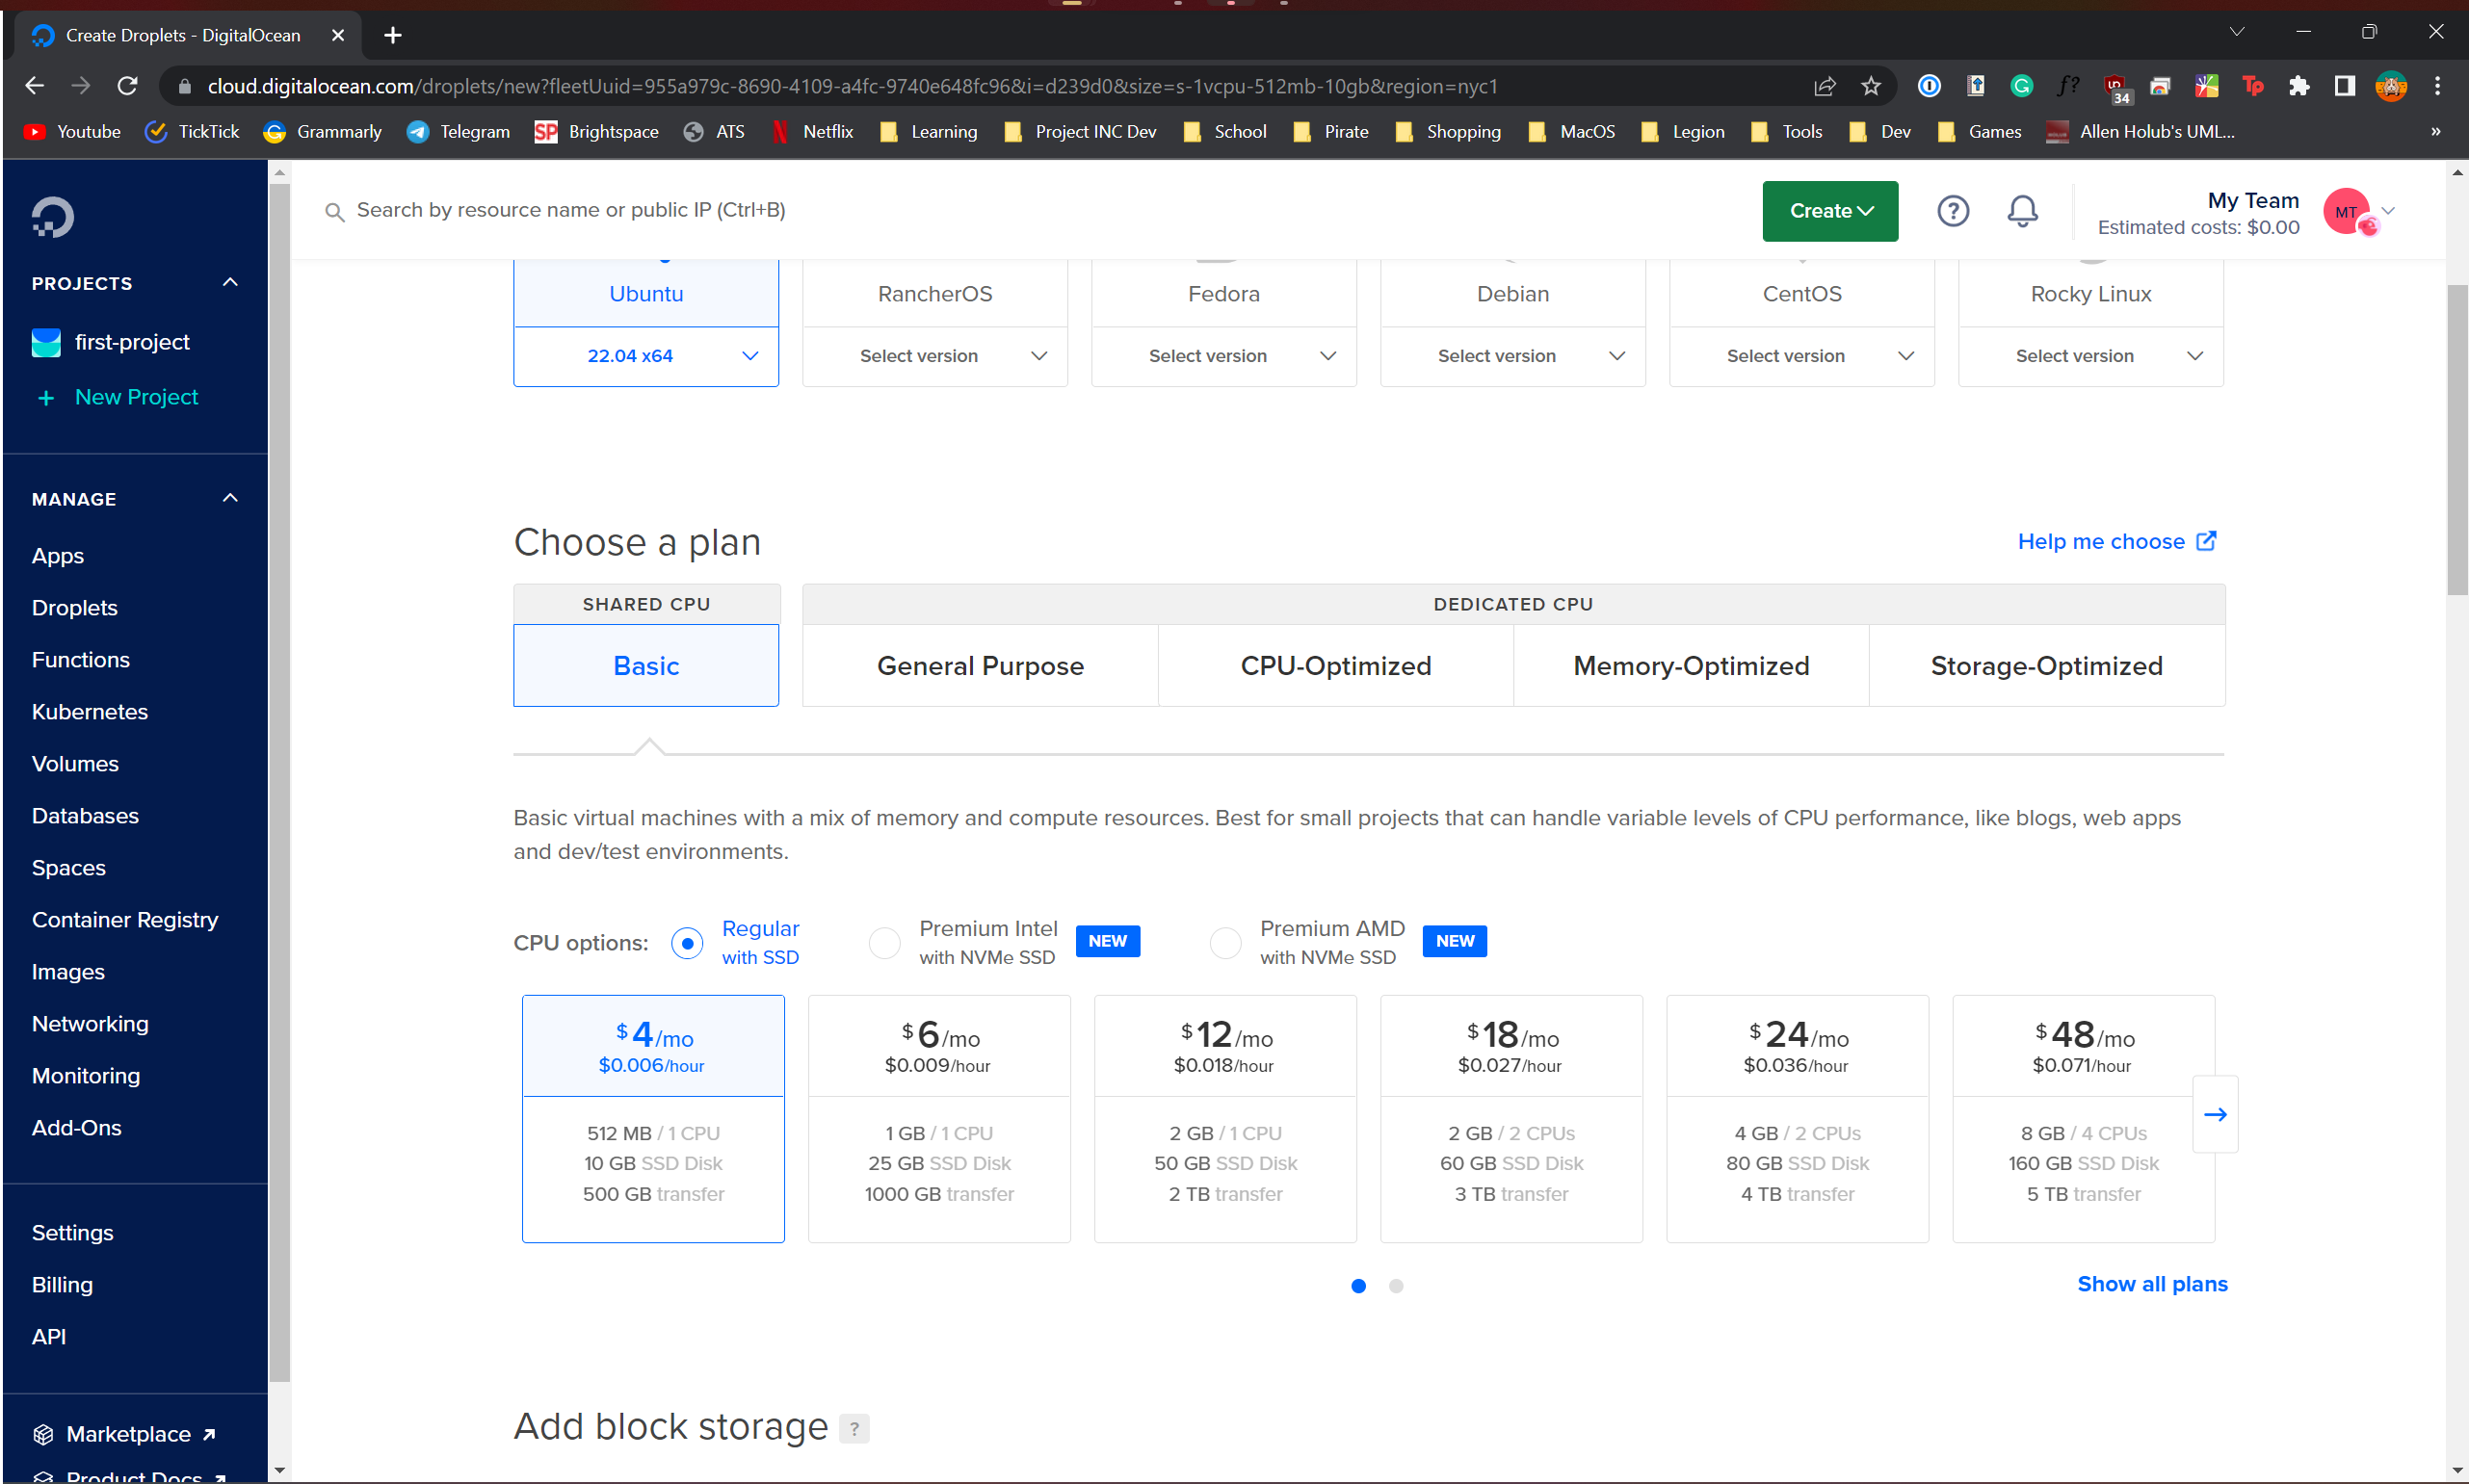
- A VPS (DigitalOcean) ($4/month) - Free credits for students under the GitHub Student Developer pack
- A Domain Name (Cloudflare) ($14 per year)
Creating a DigitalOcean Droplet
- Create a new Droplet in DigitalOcean. The basic $4.00/mo plan will help.
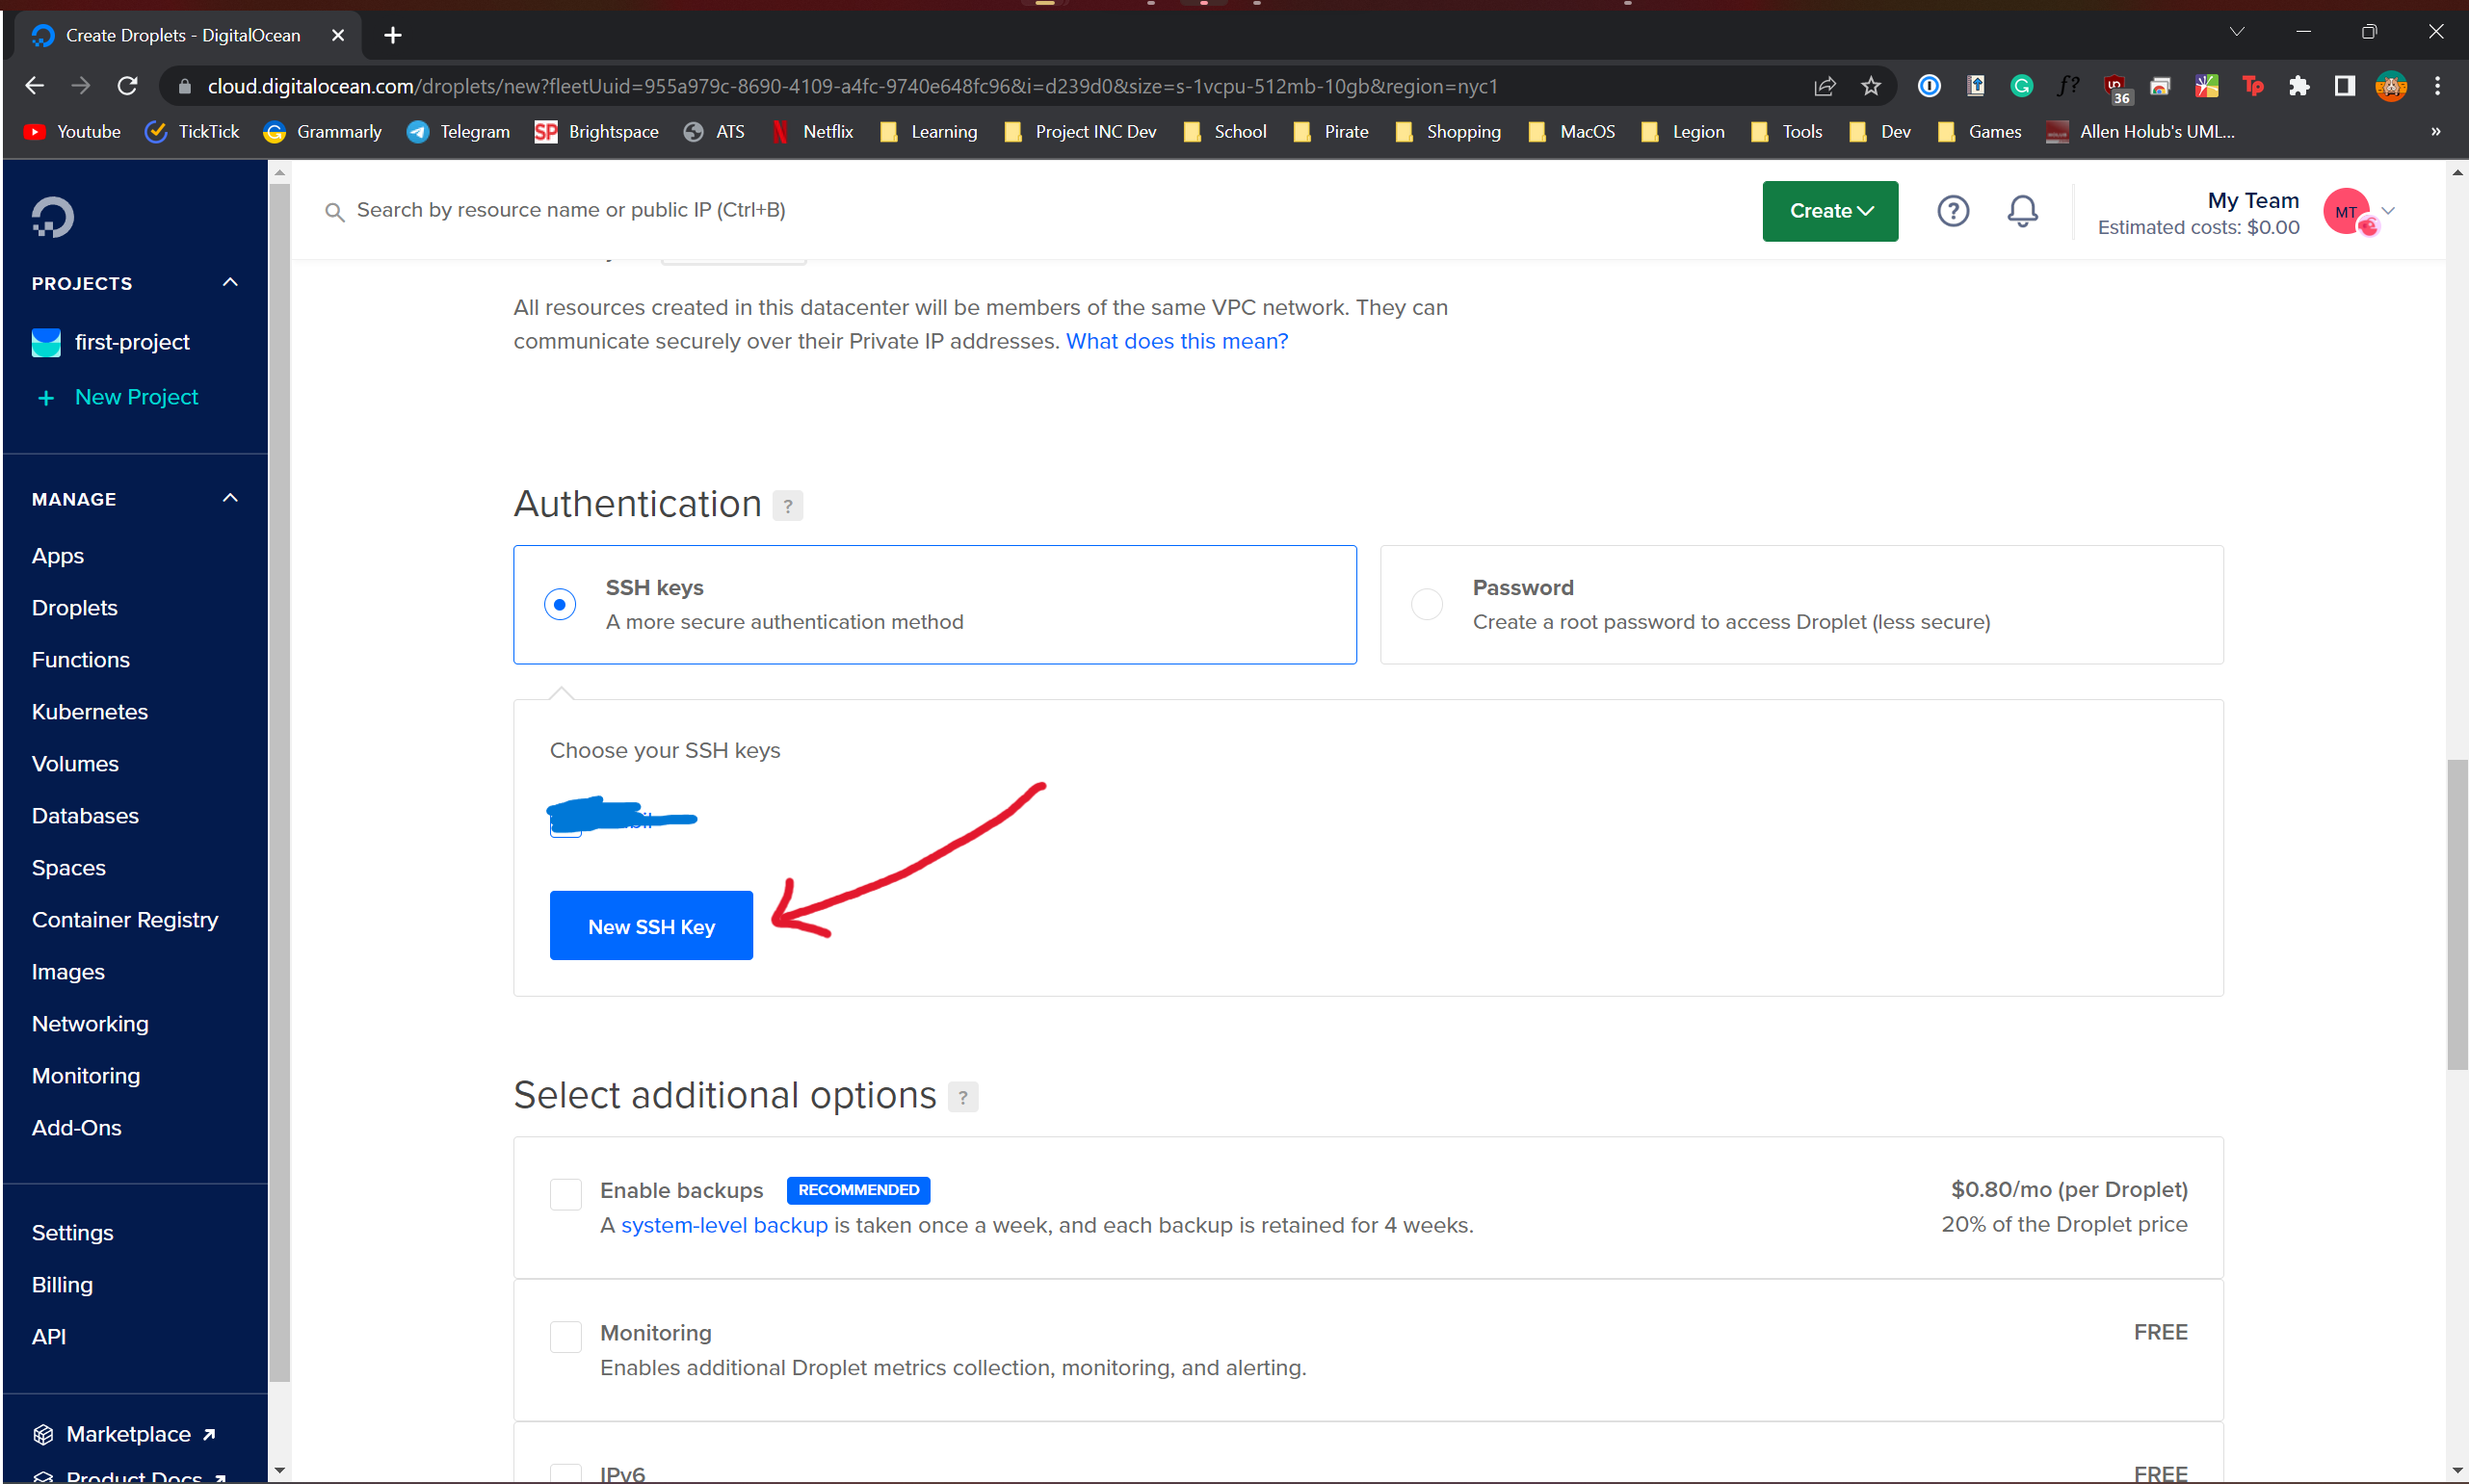
- Create new SSH Keys by clicking the new SSH Keys. The generation of SSH keys could be found in the original DigitalOcean documentation. But in this case, I used 1Password to generate an SSH key.
Configure domain in Cloudflare Dashboard
- Copy your Droplet's IP Address

- Go to your Cloudflare dashboard, log in and configure one of your domains. (We are going to add a subdomain)
- Configure accordingly by making an
A record with the name which points to the IP address you copied.

- Click save.
- Wait. (Different timing for different domain name providers but mine took approximately ~10 minutes)
Installing the proxy on your new Droplet
Note, you can follow the instructions written by Signal: https://signal.org/blog/run-a-proxy/
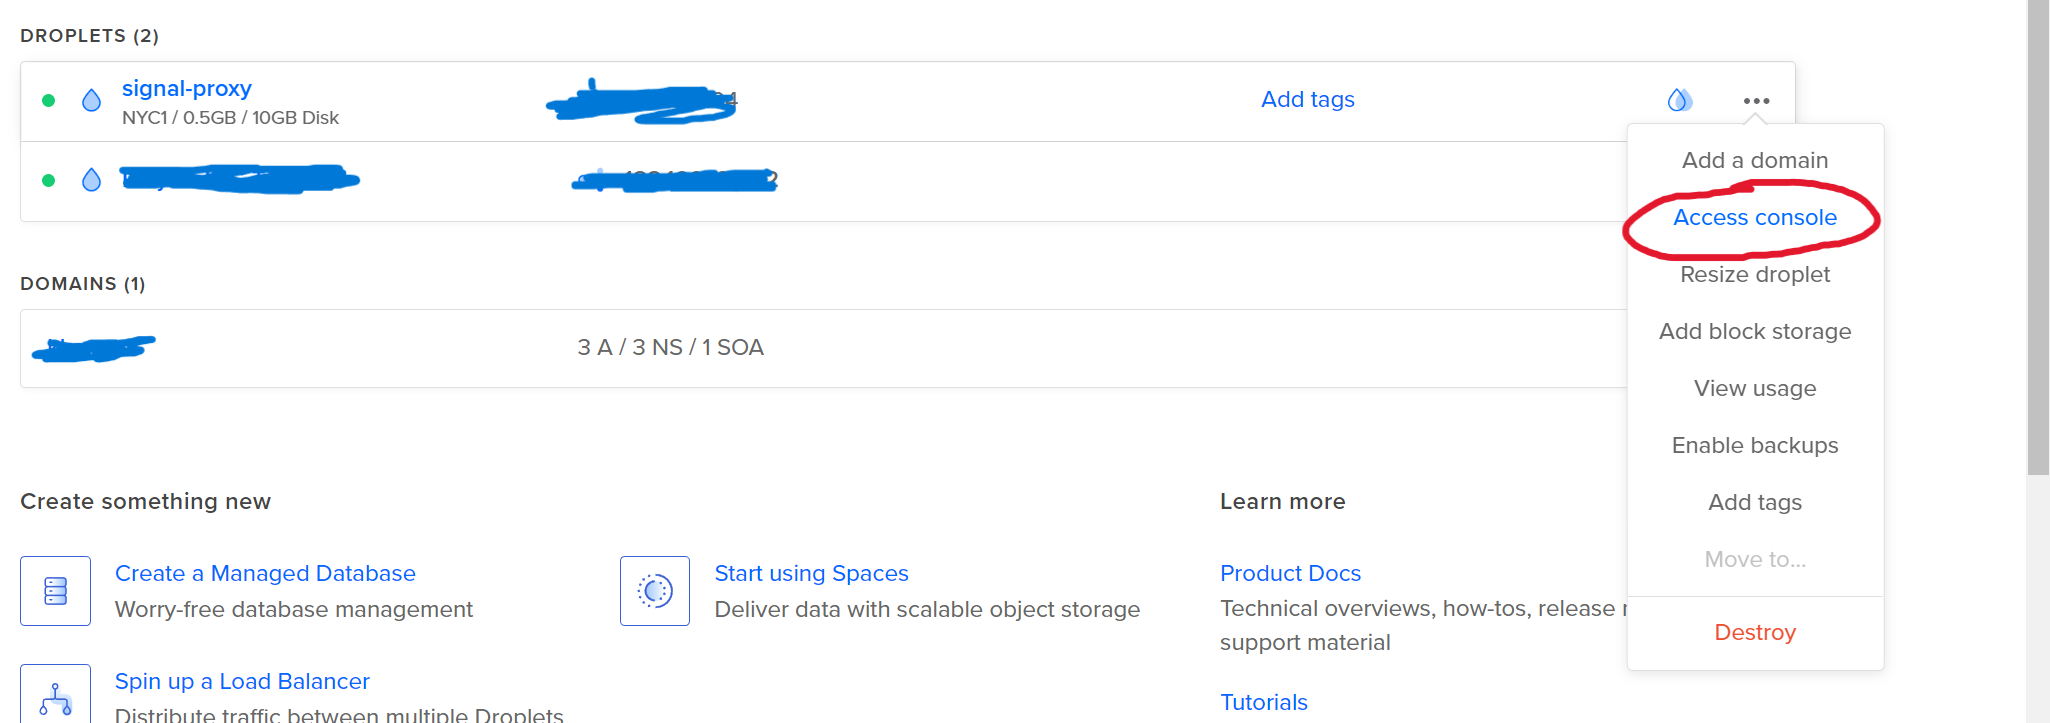
- After creating the droplet, wait a little while for the droplet to set up, and then right-click on the three dots and click on 'Access Console.'
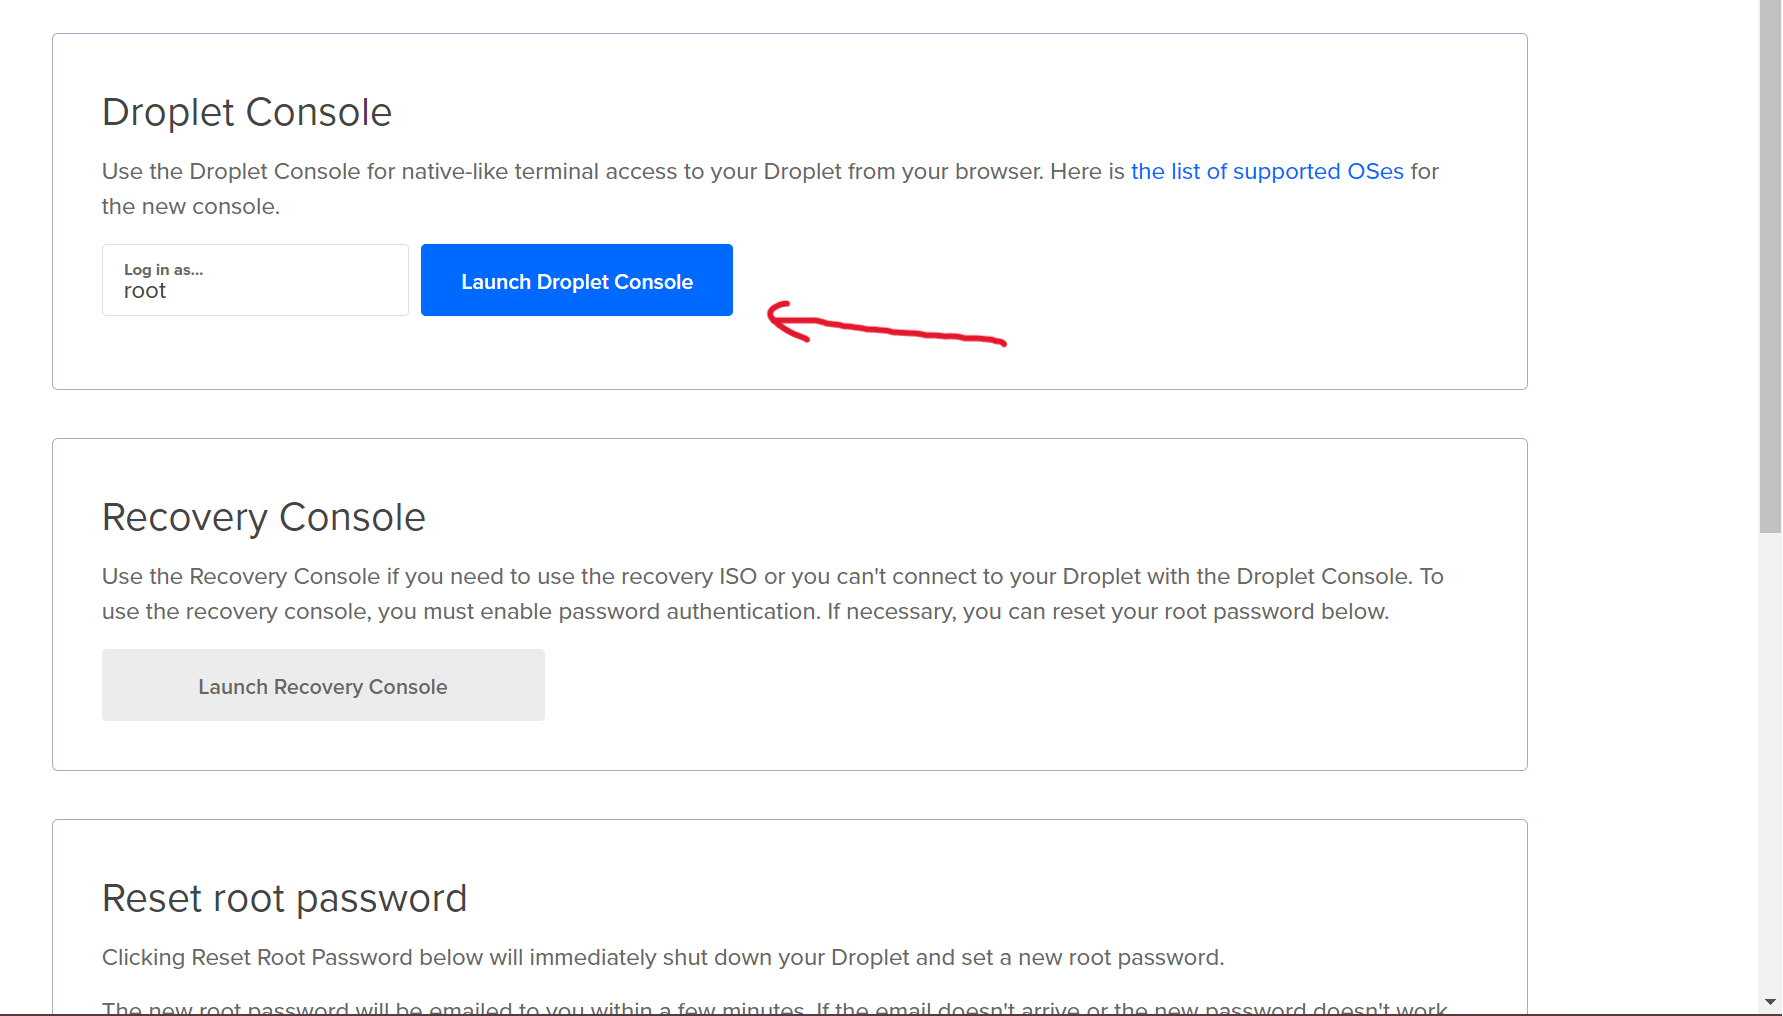
- You'll be redirected to a new page, remember to log in as
root and click on launch droplet console.
- From here on, you can follow the article written by Signal: https://signal.org/blog/run-a-proxy/
What I Did
If you didn't follow the article, you could follow what I did.
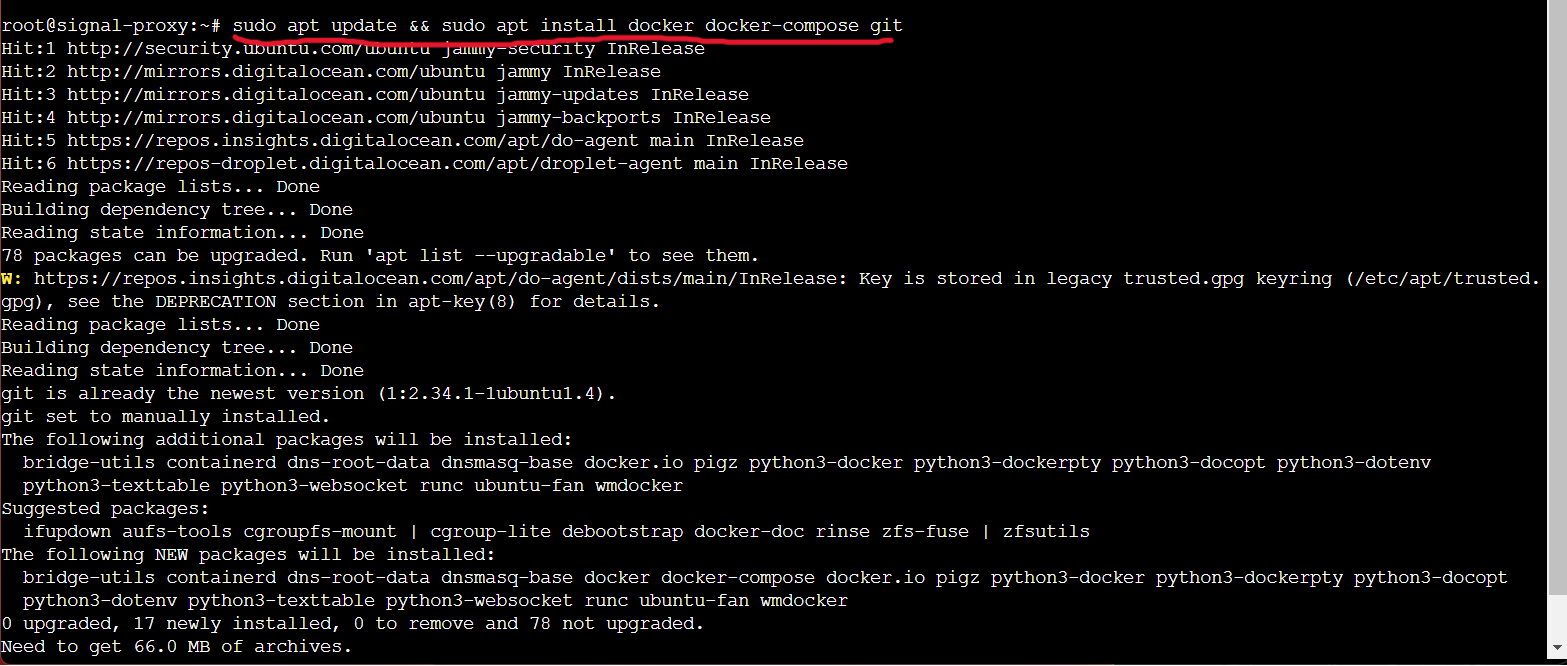
- Install docker, docker-compose, and git by running
sudo apt update && sudo apt install docker docker-compose git
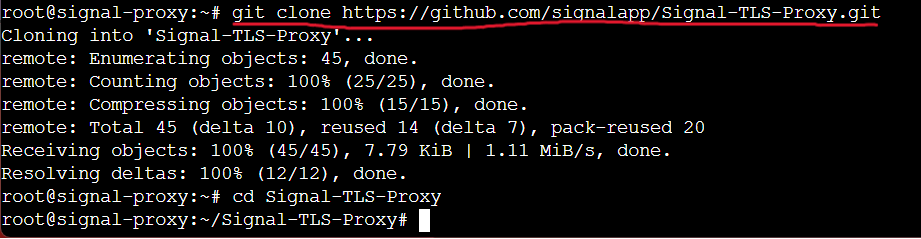
- Clone the Signal TLS Proxy repo from GitHub by running
git clone https://github.com/signalapp/Signal-TLS-Proxy.git and change directory to the newly cloned repo by running cd Signal-TLS-Proxy.
- Run the helper script provided by Signal that configures and provisions a TLS certificate from Let's Encrypt by running
sudo ./init-certificate.sh. At some point, you'll be asked to enter your domain name. Enter the domain name you configured.
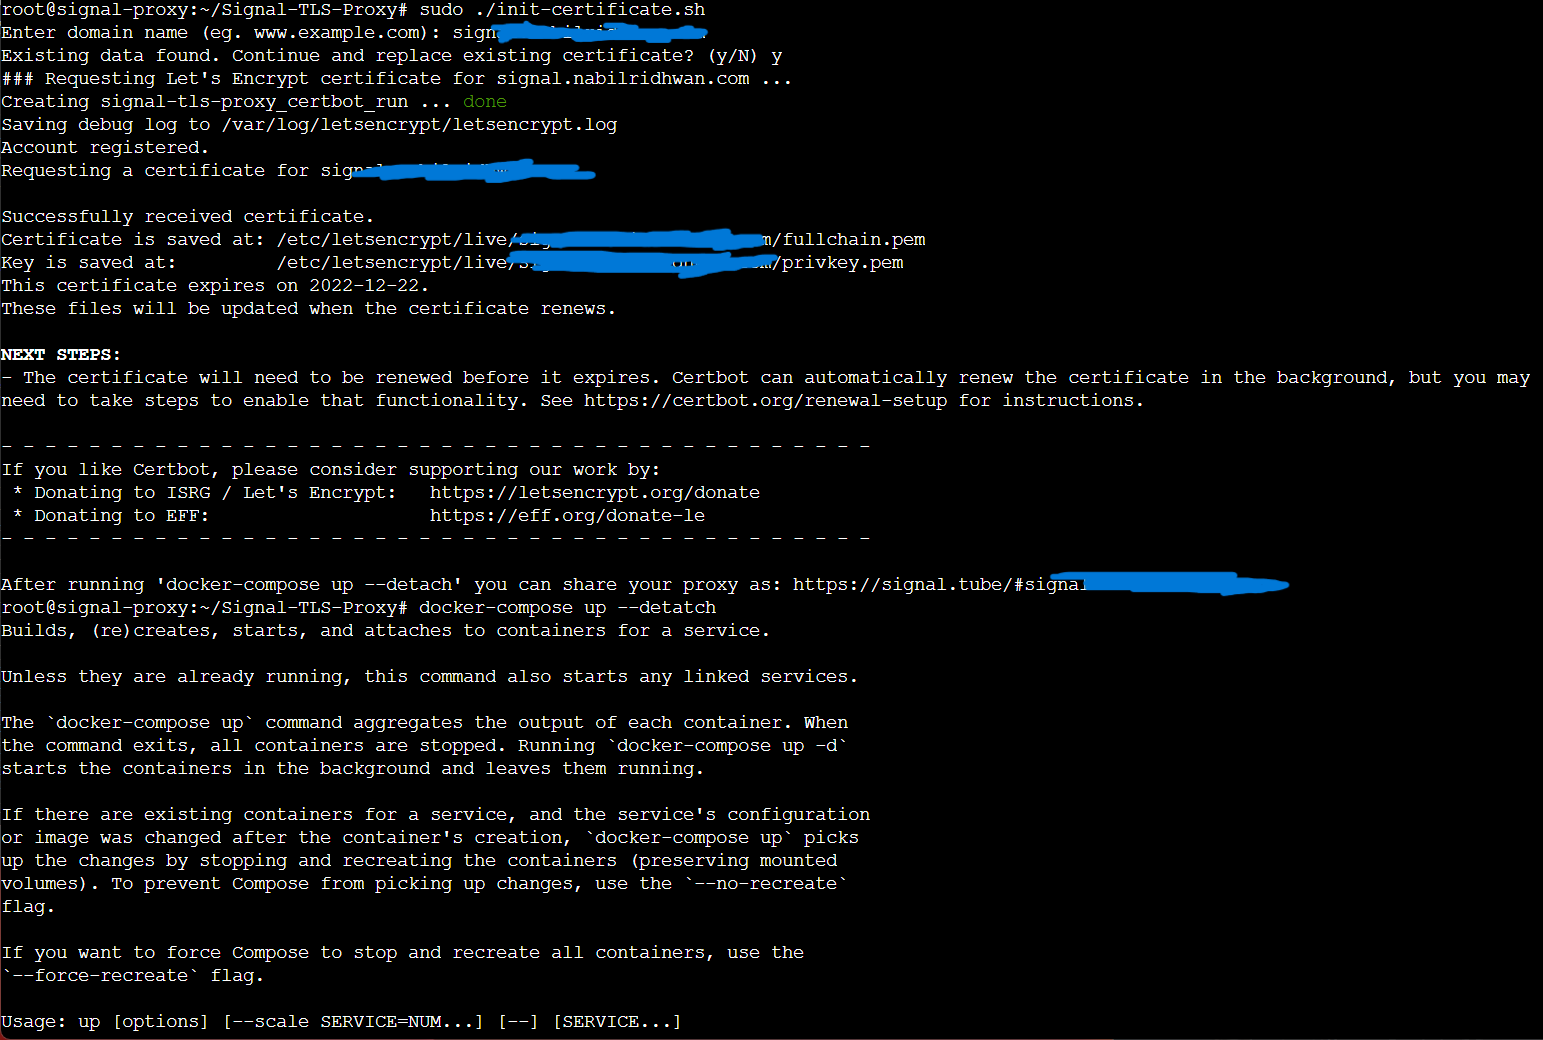
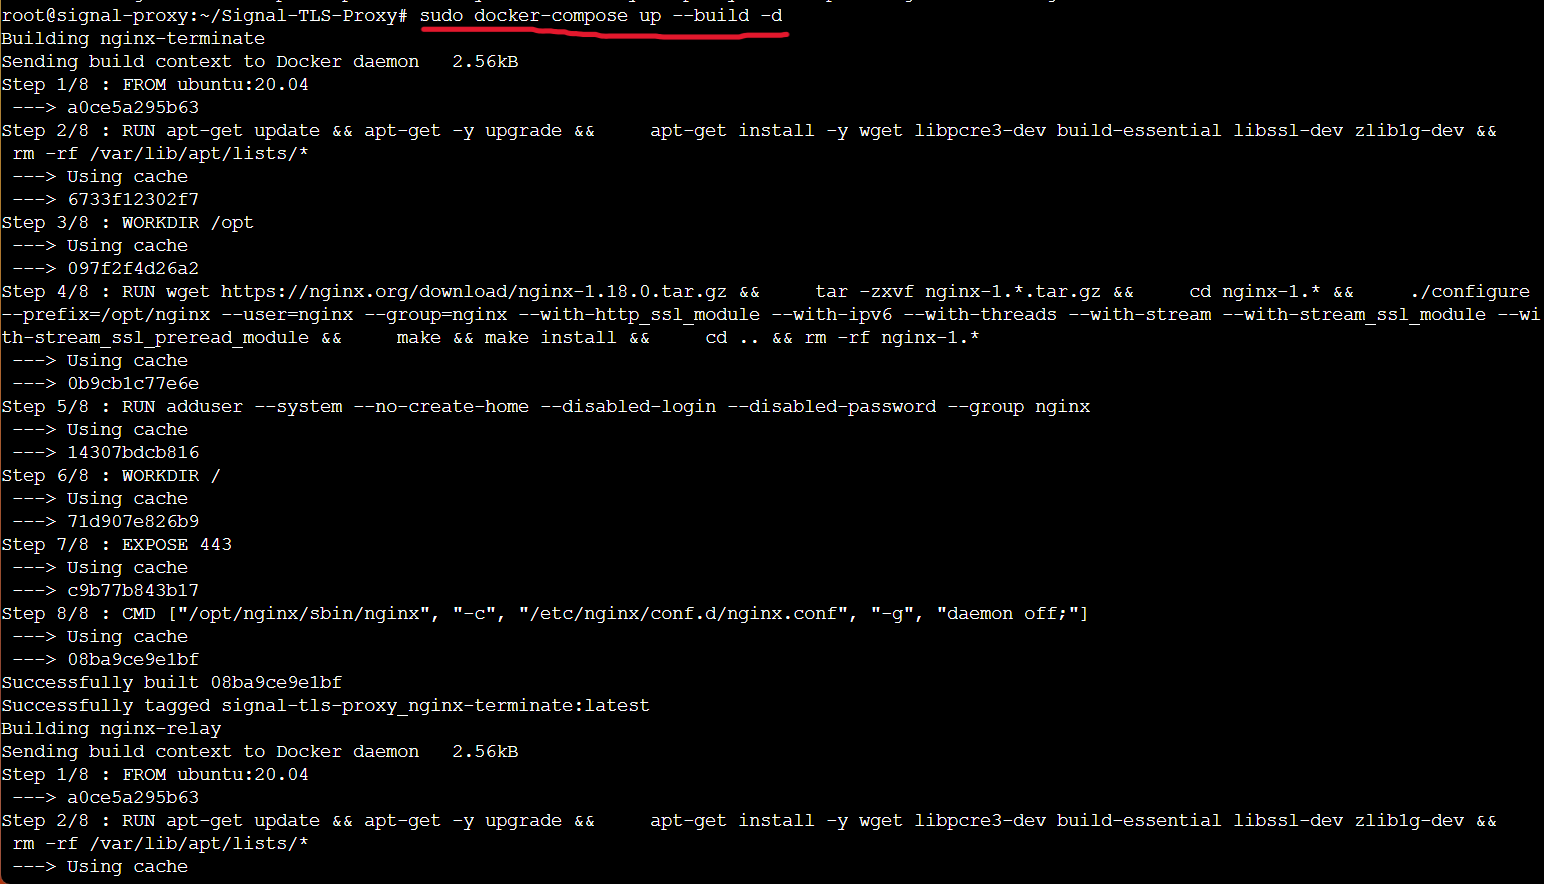
- Use Docker Compose to launch the proxy by running
sudo docker-compose up --build -d
Voila!
You're done! Share your Proxy with the world. A recommendation is not to share your proxy URL in public since they can just add your IP to a blacklist. Instead Signal encourages people to DM each other!
Credits
Signal for having an easy-to-follow article: https://signal.org/blog/run-a-proxy/
Sorry if this article is not explained in detail on the background information. It's just a simple article to get users with resources to join and help!